What is an accent wall, and why remove it?
An accent wall is a popular interior design technique that involves painting or decorating one wall in a room in a different color or with a distinct pattern. The purpose of an accent wall is to draw attention to a specific area, create visual interest, or add a touch of personality to a space. Accent walls can be found in various areas of a home, such as living rooms, bedrooms, or even hallways.
However, there may come a time when you want to remove an accent wall. There could be several reasons for this decision, including changing design preferences, wanting to create a more cohesive look, or simply wanting a fresh start. Removing an accent wall can be a bit of a process, but it is definitely doable with the right tools and techniques.
Assessing the condition of the accent wall
When assessing the condition of an accent wall, it’s essential to take a close look at the overall appearance and integrity of the wall. Start by examining the surface for any visible signs of damage or wear, such as cracks, chips, or peeling paint. Additionally, check for any irregularities in the texture or color of the wall that may need to be addressed before removing it. It’s also important to consider the type of material used for the accent wall, as this can impact the ease and complexity of the removal process. For example, a simple wallpaper accent wall may be easier to remove compared to one that is made of reclaimed wood or brick.
During the assessment, it’s also crucial to take into account the location of the accent wall and its impact on the overall aesthetic of the room. Consider whether the accent wall complements or clashes with the existing decor and color scheme. Evaluate whether removing the accent wall would create a more cohesive and visually appealing space. Remember, the goal is to enhance the overall look and feel of the room, so meticulously examining the condition and design of the accent wall is essential in making an informed decision regarding its removal.
Gathering the necessary tools and materials
Once you’ve assessed the condition of your accent wall and determined that it’s time for it to go, it’s important to gather the necessary tools and materials before you begin the removal process. Having the right tools on hand will make the job easier and more efficient. First, you’ll need basic safety equipment such as safety goggles, gloves, and a dust mask to protect yourself during the removal process.
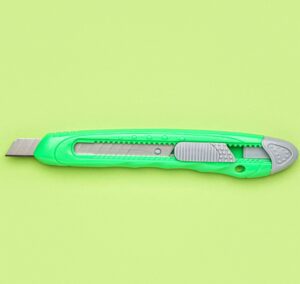
Next, gather the necessary hand tools, including a pry bar, a hammer, and a utility knife. These tools will help you to remove any nails or screws and loosen the wall covering. In addition to hand tools, you may also need power tools such as a drill or a reciprocating saw, depending on the type of accent wall and the material used. Be sure to have the appropriate blades or drill bits for the specific task at hand.
Lastly, it’s crucial to have the materials needed to repair any damage caused by the removal process. This may include drywall patching compound, sandpaper, and paint or wallpaper to match the existing wall. It’s always a good idea to have these materials ready before you start the removal so you can quickly and easily fix any imperfections once the accent wall is gone. By gathering the necessary tools and materials ahead of time, you’ll be well-prepared to tackle the removal of your accent wall and ensure a smooth and successful project.
Preparing the room for the removal process
Before beginning the process of removing an accent wall, it is important to prepare the room to ensure a smooth and efficient removal process. Start by removing any furniture or decor pieces from the wall and moving them to a safe location away from the work area. This will help prevent any damage to these items during the removal process. Additionally, clear the floor space in front of the wall to create a safe and unobstructed work environment.
Next, protect the surrounding surfaces by covering the nearby floor, furniture, and baseboards with drop cloths or plastic sheets. This will prevent any paint chips, dust, or debris from getting onto these surfaces and causing damage. It is also a good idea to tape off any electrical outlets or switches to protect them from the removal process. Once these preparations are complete, you are ready to move on to the next step of removing the accent wall.
Step-by-step instructions for removing an accent wall
To successfully remove an accent wall, it’s essential to approach the task with caution and follow a step-by-step process. Start by clearing the room of any furniture or decorations near the wall to create a safe and clutter-free workspace. Next, inspect the wall for any signs of damage or loose materials that may need to be addressed before removal. Once you’ve assessed the condition of the wall, gather the necessary tools and materials. You’ll likely need a utility knife, a pry bar, a hammer, and a putty knife, among other common DIY tools. Having these items ready and easily accessible will make the removal process smoother and more efficient.
Begin by carefully cutting along the edges of the wall with a utility knife. This step is crucial to prevent any damage to the surrounding walls. Once the edges are cut, use a pry bar and hammer to remove the trim or molding, if any gently. Slowly work your way from top to bottom, applying controlled force to loosen the wall from its surface. It’s important to be patient and avoid rushing this step to minimize the risk of splintering or breaking the wall.
Throughout the process, be prepared to encounter unexpected challenges, such as hidden nails or screws. These may require additional tools or a different approach to remove the wall safely. Remember to exercise caution and consider consulting with a professional if you feel unsure or uncomfortable dealing with these challenges. Removing an accent wall may cause some damage to the underlying surface.
Once the wall is completely removed, take the time to assess and repair any damage that may have occurred. This may involve filling in holes or cracks with spackle or joint compound and sanding the area until smooth. Cleaning up after removing an accent wall is also an important step. Use a vacuum or broom to remove any loose debris or dust. Wipe down the walls and surrounding area with a damp cloth to ensure a clean and fresh space.
Call Our Team of Experts Today
Now that you understand the steps and considerations for removing an accent wall, it’s your turn to assess your space and decide whether this is the right move for you. Remember, the goal is to create a space that reflects your current taste and style. If you’re ready to take on this project, you need to find the right remodeling company to get it done correctly and safely. Luckily, our team at BetterBuilt Builders is the best in the Bay Area, so contact us today.


